Click on the name to view demo descriptions.
[wptab name=’Stuart Batty’]
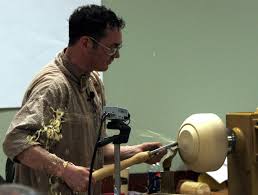
Stuart Batty
|
| Perfecting the Art of Cutting
Learn the art of cutting without torn grain. Stuart will show how to perfect cuts with the three main gouge types – bowl, spindle, roughing – and chisels, including skews, parting tools, and beading tools. Included will be the simple way to freehand grind each of the tools, allowing it to perform at its best for all wood types. He will break down the cuts in to simple movements that everyone can learn – how the right hand controls the tool, the left hand assists, and the body movements that make cutting easier and repeatable. Bowl Turning with the 40/40 Grind The 40° bevel and 40° straight swept-back wings on a bowl gouge make this the most versatile tool you can own. This demo will show you how to freehand grind the gouge on a platform and the motions used make repeatable cuts with little physical effort and no torn grain. Stuart will show how this gouge is controlled for both spindle and bowl turning. Seven Set-up Fundamentals Every cut requires correct setup, and there are 7 very important setup rules that eliminate the variables in woodturning. Following these rules makes turning safer, easier, and more fun. Stuart coined the term Negative Rake Scraping, a technique that was used by Ivory turners since the 1500’s. In this demo, Stuart will explain how Negative Rake Scraping works, how best to sharpen the tool and the rules that make it a very effective finishing technique. Stuart will also cover the difference between Negative Rake and Conventional Scraping techniques, including when and where to use these two different ways to shape wood on a lathe. |
[/wptab]
[wptab name=’Ashley Harwood’]
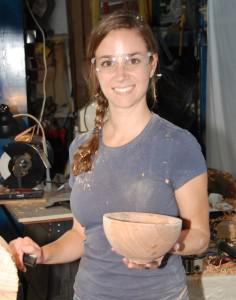
Ashley Harwood
|
| Sea Urchin Ornaments Skill level: Intermediate
During this session, Ashley will demonstrate fine spindle turning in one of her sea urchin ornaments. This is done with three tools: the bowl gouge, detail gouge, and the vortex tool. The demonstration will include tips on how to sharpen all of these tools without the use of a jig. She will talk about cutting techniques and tool control in detail and demonstrate how to combine the basic cuts of spindle turning to create a pleasing design. Ashley will also show sanding techniques. Assembly of the ornament will be covered as well as preparation of the shell and packaging. Turning for Jewelry This demo will begin with a short slide show featuring examples of different designs for wood turned jewelry and discuss jewelry design basics. Ashley will explain the techniques used for cutting basic shapes on a larger piece of wood before demonstrating how to turn fine beads out of ebony and finish them to a smooth luster. She will use a bowl gouge, detail spindle gouge, vortex tool, and small drill bits held in the Jacob’s chuck and a pin vise. The session will show how, by combining multiple small elements, it is easy to create elegant and timeless designs that can be worn for many occasions. You will also learn the basic techniques used to assemble jewelry using chains, clasps, and wire. She will also show how to create more complex pieces using multi-axis and off center turning on a small scale. Push-Cut Bowl Turning For this demonstration, Ashley will turn a thin-walled bowl using the Push-Cut method. She will talk about the Seven Fundamentals of the Perfect Cut, which include stance, lathe speed, chucking, grain direction, and more. You’ll learn how these fundamentals are crucial in any kind of turning and create a solid foundation for the woodturning practice. She will demonstrate how, using the Push-Cut, it is possible to make a complete pass from the bottom to the top of the outside of a bowl in one cut. There will be discussion on how the Push-Cut can eliminate torn grain and stress on the body. She will also discuss aesthetics in bowl turning and the benefits of adding simple design elements. She will also demonstrate free-hand sharpening of a bowl gouge and will use a bowl gouge with a different grind across the inside bottom third of the bowl. Bowl Rim and Foot Design This demo will show you how to turn the outside of a bowl using the Push-Cut method. You will see various design elements that can be added to the rim and/or foot of a bowl on the lathe. Ashley will use a bowl gouge, vortex tool, and negative rake scrapers to add details to the bowl and will demonstrate sharpening of all of these tools. She will talk about design aesthetics, e.g., bowl shape and curve, proportion of the foot, creating rim and foot designs that work together. She will briefly address how to sand the bowl without dulling sharp details. |
[/wptab]
[wptab name=’Curt Theobald ‘]
Curt Theobald
|
| Segmenting: Where do you start?
There is more to segmented turning than gluing pieces of wood together and then going to the lathe to turn a segmented bowl. This demonstration, geared to all skill levels, will help you learn where to begin or how to refine your current skills. We will discuss wood choices, wood movement, planning, design considerations and material preparation to help you better understand how to create successful segmented projects. Segmented Bowl Construction Don’t let the apparent complexity of a segmented pattern intimidate you. By participating in this presentation and watching the methods conveyed, attendees will learn how to accurately plan their own projects and begin to foresee any potential problems before any wood is cut. Curt will show how to create patterns that can be used to enhance segmented woodturnings. Many methods will be shared to help attendees more easily and accurately perform segmented pattern glue-ups in their own workshop, in addition to learning multiple timesaving techniques. Open Segmented Turning Open segmented turning is gluing multiple pieces of wood together, leaving gaps between each segment to create interesting effects, designs and illusions that highlight qualities of a variety of woods. In this demonstration, attendees will learn technique and theory, explore design concepts, and have a better understanding of the adventure known as open segmented turning. Thinking Outside of the Box Sometimes it can be difficult to make segmented turnings that stand out from other segmented works. This session, which is beneficial to both segmented and non-segmented turners, will challenge attendees to think differently about the creation of their work. We will take a step-by-step look at a sculptural piece Curt created and discuss the steps he pursued to make his vision a reality. Some of the topics presented will be inspiration, evolution of design, problem solving, prototyping, and creation of the piece. |

[/wptab]
[wptab name=’ Cynthia Carden Gibson ‘]
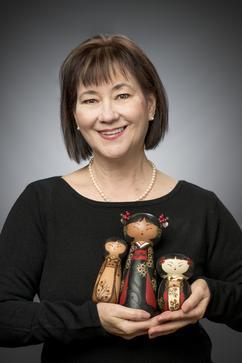
Cynthia Carden Gibson
|
| Embellish your world! Pyrography 101
Cynthia will share the basics of her style of Pyroengraving. Attendees will take away information on the wood choices best suited for pyrography, preparation of turnings, preferred tools, the use of those tools and finishing your work. You are sure to leave this demo armed with the tools needed to begin your journey into pyrography. Inspiration and Embellishment How do you come up with signature designs? What gives your work a unique quality or voice? In this slide show, Cynthia hopes to encourage self-discovery and show how a look inside can bring out unique qualities in your work as she tells her stories and those of others through her collaborative path in woodturning. Translating embellishment to a 3D surface and adding color to your work Cynthia will discuss and demonstrate her approach to implementing designs on a 3D surface, designing turnings for embellishment, choosing the best design for the shape of your artwork and adding color to your work. |
[/wptab]
[wptab name=’Hans Weissflog’]
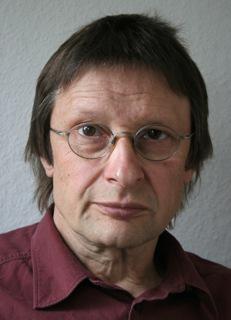
Hans Weissflog
|
| Saturn Box
The Saturn Box is a ball box with a loose ring around it. It is turned from one piece. The box has a ball shape, the ring is flat, together it looks like the planet Saturn. In the demo, Hans will show and explain how to turn this piece, how to make all the chucks. Drunken Box The Drunken Box is a box that looks like a sphericon. It rolls in 2 directions. Hans will show how to turn it and how to make the chuck to hold it on a very small edge. Pierced Box In this demo, Hans will show how to turn the pierced lid and the bottom of the box. He will explain how to make the “out of center “chuck and talk about the tools he uses to finish everything. |
[/wptab]
[wptab name=’Jakob Weissflog’]
Jakob Weissflog
|
| Sphere
Jakob will show how to turn a sphere perfectly round without measuring. The way he shows it is how you learn it in a regular German apprenticeship. Ball Box with sides This is a ball box that has two segments of a rings on the side to hold it together. In the demo, Jakob will show how to turn this box and put the pieces together. |
[/wptab]
[wptab name=’Avelino Samuel’]
Avelino Samuel
|
| Spiral Carved Vessels-Turning and Layout
This session will focus on creating a vessel suitable for carving spirals, including wood selection, hollowing techniques, and form. Turning the form, shaping, and hollowing the form to the suitable thickness for carving will be covered. Other factors to be covered include the number of segments and the layout of the design using indexes, templates, and stencils. Spiral Carved Vessels- Carving, Sanding, and Texturing This session will review the process of carving, sanding, and texturing a vessel. This process will involve the use of a power chisel, rabbet plane, micro plane, and shop-made tools for sanding. Recommendations for sanding grits, finishes, texturing and pyrography texturing will be covered. Turning Finials This session will review the types of wood most suitable for finials. The tools and chucks suitable for this process will be covered. The design elements to consider when turning a finial will be discussed. In addition, a finial will be turned following a step-by-step sequence. Turning Collars, Feet, and Spout This session will review the types of wood most suitable for collars, feet, and spouts. How to mount the wood using different chucks and chuck jaws will be covered. Design elements that need to be followed when turning these parts of the vessel will be covered. Finally, a collar, a spout, and a foot will be turned following a step-by-step sequence. |

[/wptab]
[end_wptabset skin=”default” location=”top” ]
