
| Nick Agar - Nick Agar Studios |
 |
|
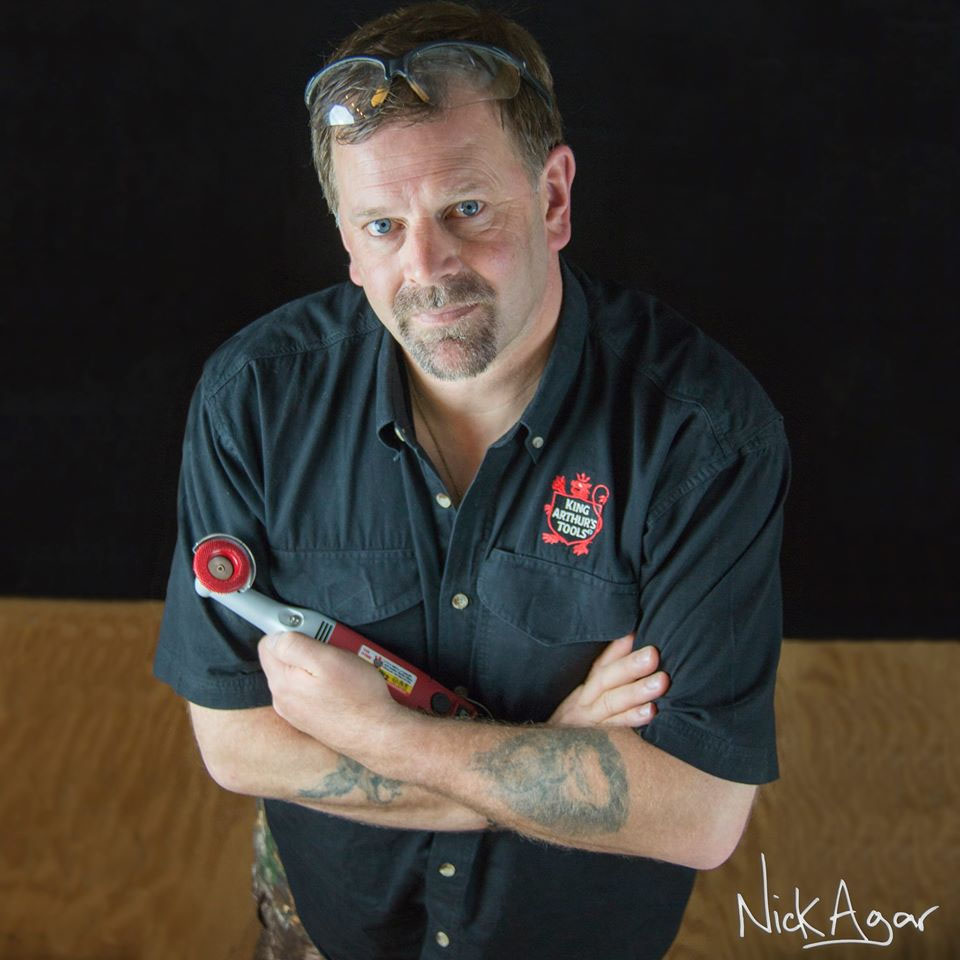
Nick Agar has become one of the most sought after instructors /
workshop leaders and seminar presenters on the world woodturning stage. He is one of the most creative makers in the field and has an unsurpassed knowledge and understanding of the many processes that are now used in this creative medium. Specializing in surface enhancement and renowned for his wall sculptures, his award winning work often incorporates carving , airbrushing , ceramic and metal effects . Nick has inspired many woodturners with his work and has traveled across the world to demonstrate his skills Having now relocated to the United States he has recently opened new teaching studios nr Savannah Georgia.
With more than 30 years experience He has a great understanding of his medium . Choosing Maples for decorative works or burrs and intriguing or figured timber for sculptures or natural edged works Agar is a master at exposing natures treasures that hide beneath the bark.
Inspired by organic forms, pottery,sea life ,ancient cultures and his natural surroundings , he specializes in hollow forms , large diameter work, and surface enhancement .He is renowned for his Viking sunset bowls and wall sculptures in particular. His award-winning work often incorporates carving, airbrushing ceramic and metal effects In addition to exhibiting widely and appearing at international conferences both as a demonstrator and a judge, Nick is in constant demand for commissions from collectors, his wide range of clients including HRH Prince of Wales, Dukes, Duchesses and the Royal jewelers, Aspreys. He and his work have also featured on BBC and ITV lifestyle television programmes. Nick is a member of the Worshipful Company of Turners and has recently
been awarded the Freedom of the city of London in recognition of his services to the world of woodturning. Nick is Patron of the Max Carey Woodturning Trust.the only woodturning trust in the UK He is co author of the book "woodturning evolution " an elected member of the Devon Guild of Craftsmen, and a Registered Professional Turner. A member of the AWGB and AAW He has also been made Honorary member of several woodturning clubs at home and abroad . Nick is a popular demonstrator /teacher on the Woodturning cruise . Demos
Viking sunset bowl: A, Bowl turning technique explained. Many different textures and use of color bring this iconic and ever popular design to life. Bowl with textured lid and off center finial: Simple bowl form studying gouge work and tool grinds. A fitted, textured and colored lid with offset finial. Tooling tips and advice, design elements, power carving and coloring with wood dyes and gilt.
Wall piece: Each one will be different. Come see what this demo produces as I turn a" one of a kind” wall piece. Work holding ideas, tool choice and control, decoration, design elements, use of air brush, carving burrs and a wild imagination … where will it lead you?
|
 |
Hi my name is Laurent Niclot, I am originally from Toulon in the south of France, but am currently living and working in Fort Collins, Colorado USA. I have always loved wood, so it was only natural for me to study woodworking, woodcarving, cabinet making, furniture making, and design. I discovered woodturning from Jean-François Escoulen, and I knew it was how I wanted to make a living. So, in 2015, at age 20, I took the six-month woodturning class at the Escoulen School in Aiguines, France, with Jean-François and Yann Marot. Then, the school hired me as an assistant and translator for 3 years, gave me a studio and a lathe to practice my passion, and the possibility to meet many other artists and woodturners who now inspire my work. I have had the opportunity to share my passion and teach woodturning to those in France, Belgium, Canada and all over the United States. I enjoy demonstrating (both remote and in-person), teaching short one-day through week long classes, and continuing to explore my own artistic practice. My current work ranges from traditional woodturning to woodburning, carving, multi-axis, coloring and texturing.
My workMy work is experimental: I like to play with the wood and try new textures and colors, new tools, and new techniques. I also enjoy giving a new life to a piece of wood. My job as an assistant gave me the opportunity to find and use interesting wood that may have too many cracks and knots for the students. I carve with rotary tools and gouges to create new shapes and textures. My aim is to make pieces that are sculptural, decorative, and designed with a strong message or a story to tell. I also enjoy collaborating with other artists, creating pieces with a strong story and with materials or techniques that I wouldn’t be able to make on my own. It allows me to see my work with a different eye and evolve, learn and share an experience with that person. Demos Miniature Teapots: Turning of a miniature teapot (approximately an inch) using the bedan and demonstration on how to use it with the bevel up for spindle turning, hollowing of the teapot with miniature hollowing tools. Then turning of the lid and the spout (magnifiers not included) and coloring using Indian ink and gilding wax to create the Damascus steel effect. Finally, demonstration on how the make the handle using a wire and a cotton string on the lathe. Ploc! Multi- Axis Drop: Turning and turning off-center of a drop using a spindle gouge and a skew. Then carving of the top of the drop using gouges and rasps to make it thinner and have two different curves on the back and the front giving it an illusion of movement. And finally, texturing of the drop using a woodburner to create a Steampunk design, a combination of gears and metal plates, and coloring using Indian ink and gilding wax. The Sphere: Roughing out and turning of a perfect sphere between centers and remounting for the finishing using a jam chuck made out of green wood. Hollowing the sphere using small hollowing tools in a homemade chuck for a precise and safe method of hollowing. The sphere is a very pure shape but is also one of the most complicated. It is a great canvas for carving and texturing as well as a pleasant shape that will put forward the beauty of the wood grain. |
| Kimberly Winkle |
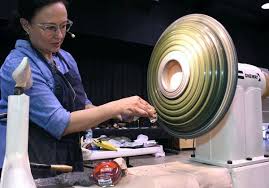 |
| Kimberly Winkle is a maker who creates furniture and objects using wood and paint; her work displays a balance of form, color and surface pattern. She has exhibited nationally and internationally, including SOFA Chicago, Wanted Design NYC and the Architectural Digest Home Show. Her work has been included in a number of publications, including Fine Woodworking, Woodworker, and Woodworker West magazines and the books 500 Tables, 500 Chairs, Fine Woodworking Design Book 8, among others. Winkle has completed several artist residencies, including the International Turning Exchange (I.T.E.) at the Center for Art in Wood in Philadelphia, the Windgate Artist Residency at State University New York (SUNY) Purchase, Haystack Mountain School of Crafts, Vermont Studio Center and at the Appalachian Center for Craft. She has been awarded 4 Niche awards, a State of Tennessee Individual Artist Award in 2011 and the Society of Arts and Crafts (Boston) John D. Mineck furniture fellowship in 2014.
Winkle is a Professor of Art and Director of the School of Art, Craft & Design at Tennessee Technological University. She holds a Bachelor of Fine Art in Ceramics from the University of Oklahoma and a Master of Fine Art in Furniture Design from San Diego State University. Her workshop teaching experience includes, Haystack Mountain School of Crafts, Penland School of Crafts, Arrowmont School of Arts and Crafts, Anderson Ranch Art Center, The Center for Furniture Craftsmanship, John C. Campbell Folk School and the Appalachian Center for Craft. Demos Turning a Small Stool: During this demonstration students will learn how to turn a small stool. Kimberly will demonstrate how to faceplate turn the seat, design and create a template for turning duplicates, and spindle turn matching legs. Whether you’re interested in turning one leg or one hundred and one, these techniques and tips will help. These same techniques can be applied to making multiple parts of most anything: candlesticks, chair rungs, banister railings…. From Drab to Pizzazz: Milk Paint and Surface Embellishment: You keep hearing of Milk Paint over and over again but have no idea really what it is or how to begin using it, right? Kimberly will demystify Milk Paint. During the demonstration, students will learn how to properly mix, use, and explore the infinite possibilities of Milk Paint. Although Milk Paint is often associated with traditional furniture forms, the material can be used on practically any surface or format: - metal, stretched canvas, bedroom walls, kitchen cabinets, toys, furniture… Your only limitation is your imagination. Milk Paint is incredibly durable, eco-friendly and comes in a delicious color palette. Students will learn how to use Milk Paint and to explore the wide range of visual possibilities. The techniques learned can be translated to any number of other projects or formats. Turning a wall mirror During this demonstration, students will learn how to turn a two-part wall mounted mirror. Using face plate turning techniques to turn the forms, students will learn how to transform and combine common techniques into something that is uncommon in format. |
| Mark Gardner |
 |
| I was born and grew up in Cincinnati, OH. Woodworking was my father’s hobby and I was introduced to it through him and I feel lucky to have started learning woodworking as a teenager. Dad had a lathe and I fooled around on it from time to time but it wasn’t until I attended a two week woodturning class at Arrowmont School of Arts and Crafts in 1996 that I was “hooked” on the turning process.
I moved to Saluda, NC in 2000 and have been able to focus on my woodworking since opening my own studio there. In addition to making my work, I teach and demonstrate woodturning around the country for woodturning clubs and craft schools. Demos Turn hollow forms without the hollowing. Cut it in half: Hollow forms turned through a small opening were always a challenge for me to turn. In this demo I'll show how I make hollow forms, using green wood, much like you make lidded boxes only I'll glue the lid back on. Not only is there less risk of turning through the side of your vessel but it is also easier to gauge the wall thickness as well as remove the shavings from the inside. I'll focus on techniques for making a precise joint to help ensure that the piece stays together as it dries. Time will be spent demonstrating various ways to then hide the seam in your vessel. This vessel will also have handles. Surface embellishment for your turnings: I will demonstrate all the various techniques and methods I use for embellishing my work. I’ll start by showing how I layout geometric patterns on my turned vessels. Some of the techniques I’ll cover include, carving with hand and power tools, engraving, and even some textures done on the lathe. I’ll show how I use milk paints and dyes to enhance the carved patterns and lastly how I sharpen my carving tools using a simple homemade MDF strop. Turn a shrink box: A shrink box is a container that is made from green wood with a bottom that is a dry disk of wood fitted into a groove in the base of the box. The green wood box shrinks as it dries locking the bottom in place. Traditionally these were hand carved. I’ll demonstrate how to turn the box, cut the groove and carve and shape the bottom to achieve a good tight fit. Typically turned wood boxes are made from dry wood, I like this technique as it is a way to make lidded containers but still use green wood. |
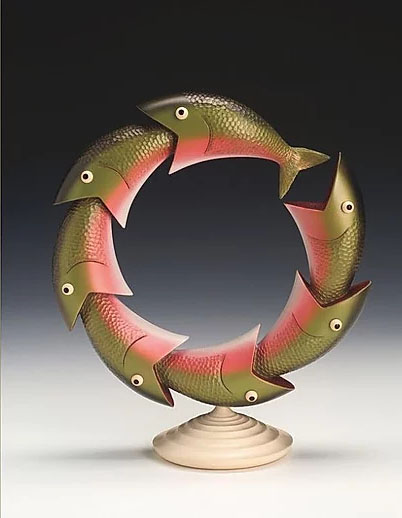
| Rudy Lopez |
 |
|
At a very young age Rudy began to develop his creative eye through photography, his first artistic pursuit. and began his relationship with wood as a craftsman of fine furniture and cabinetry. With an education in drafting and design, and many years working as a professional photographer, the transition into woodturning has been a seamless flow into another creative endeavor. Rudy's energetic easy-going personality and his ability to explain woodturning techniques in a simple understandable manner have allowed him to share his skills and enthusiasm for woodturning through teaching and demonstrating at regional and national symposia and clubs across the country. Rudy also conducts workshops in his Tampa studio and teaches at schools including: Arrowmont School of Arts and Craft, John C. Campbell Folk School, Marc Adams School of Woodworking, the Center For Funiture Craftsmanship and The Florida School of Woodwork. From Rudy: "I have always had a love of natural objects and the environment in which those objects flourish. My adolescence was spent pursuing anything and everything outdoors and with that came my love of wood. I spent much of my life on my uncle’s cattle ranch near Tampa, Florida. All the many days spent with my father and uncles working cows and being in the woods gave me a great appreciation for the out-of-doors, and all things relating to nature. To this day, my greatest pleasures come from enjoying nature with my wife hiking, hunting, fishing, mountain biking, kayaking, and just being in the woods. I love everything about wood, rough or smooth; it possesses a warm welcome feel. Wood grows from the earth with its endless earthy color variations and the swirling grain patterns of burls and knotty woods. Wood has an unlimited potential for creativity but also flaws and faults, cracks, knots, and other defects which sometimes make it difficult to work with. This is my favorite kind of wood. Wood is an imperfect medium, yet I never cease to be amazed by the incredible amount of beauty to be found in it as I create a new turning. To me this is the beauty that God and nature has provided me with as a starting point, then it becomes a challenge to continue this and create something of beauty for others to enjoy. I feel my goal as an artistic woodturner is to bring out this beauty and enhance it to create something that invites the eye and beckons the touch. I prefer simple shapes with flowing lines that showcase but preserve and reflect the natural characteristics of the wood, thus becoming something of beauty for many to enjoy for years to come." |
Demos
Square to Round Bowls, Vases and Hollow Forms: I will explain and demonstrate the process I use to create a bowl or vase, which is square on top and tapers to round at the bottom. Starting with a square or rectangular blank that has been prepared on a bandsaw to taper the sides, the remaining exterior corners will be turned leaving the four tapered sides previously cut on the band saw, then the interior of the bowl or vase will be turned into the square top. I will show a variety of ways blanks can be cut on the band saw which will start you thinking about how many different design possibilities there are for these square to round projects. I will demonstrate the process I use to set-up and draw the layout of a design on the blank and how it is cut on the band saw then oriented on the lathe to be turned. The basics of bevel-supported cuts along with two of the most important fundamentals of turning - sharp tools and good tool control will be emphasized. Attendees will learn how and why this along with lathe speed affects how efficiently and cleanly interrupted edges can be turned safely. Techniques for sanding and/or embellishing the different surfaces of the forms will also be discussed. This demonstration will provide attendees with several new creative ideas and open up many new design possibilities.
Square Wing plate from a 2x6:, I will be turning a small square wing plate from a 2 x 6. Emphasizing the two most important fundamentals of turning, sharp tools and good tool control I will cover the basics of bevel supported verses non-bevel supported cuts. This is great practice with cheap material and will help you improve your technique on interrupted cuts, which will help you achieve a clean smooth finish from the tool that will greatly reduce sanding. In case you do not get that perfect bowl gouge cut I will explain sharpening and using negative rake scrapers to clean up the surface. I will show the quick simple method I use to jam-chuck the plate to finish the bottom. We will discuss design and layout considerations regarding grain pattern orientation in the 2x6 when picking the board and turning the bowl. Some helpful hints to help make turning thin interrupted cuts easier will also be demonstrated.
Thin Stem Natural Edge Goblet from a Limb: We will be turning a thin stem natural edge goblet from a green limb approximately 1 ½ - 2 ½” dia. I will show attendees the simple techniques I use to easily turn a thin stem natural edge goblet from a green limb using mostly a 1/2" or 5/8" side ground bowl gouge. I will explain limb selection, pith orientation, different techniques used for stabilizing thin stems, the use and sharpening of Negative Rake scrapers and drying to help avoid cracking.
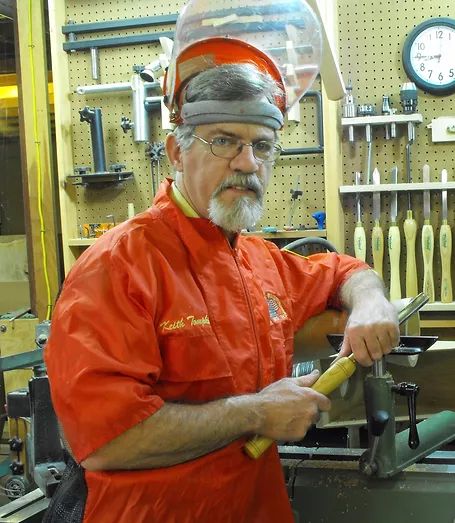
| Keith Tompkins |
 |
|
I can still vividly recall my first experience at the lathe…I turned a pair of walnut candlesticks in high school wood shop. I watched spellbound as the form of each candlestick developed. The intoxicating scent of black walnut filled the air as piles of shavings grew around me. A film of French polish applied to the revolving pieces seemed to bring the swirling grain to life. Something inside of me had come to life as well; I had discovered a passion for woodworking that would endure for a lifetime. My school experiences led me to seek employment in a large cabinetmaking shop. Initially, I was assigned mostly menial tasks, from stacking lumber to sweeping the floors. I started at the bottom, but I had no intention of staying there. I studied the master woodworkers. I observed how they sharpened their tools. I listened to their finely tuned hand planes as they effortlessly produced translucent ribbons of wood. I asked annoying questions, and I watched. And I learned. I took pieces of scrap wood home after work and I practiced. I read every book on woodworking and design I could find. My perseverance did not go unnoticed; I eventually became assistant to the company President, where I was responsible for designing and building prototype furniture pieces, and the jigs and fixtures required to put them into production. I was granted several design and utility patents for this work. I was also responsible for training new employees and overseeing production in the shop. Subsequently, I was employed by several other cabinet shops before I began my own custom furniture business. Gradually, my interests have evolved, from making functional furniture pieces to creating artistic wood turnings. It has been over forty years since I created my first lathe-turned objects, yet I feel the same sense of accomplishment when I take an abstract concept and transform it into a completed object. Working at the lathe gives me a sense of complete freedom; and allows me to explore the limits of my creative ability. I find inspiration comes in many forms; a walk in the woods, the appearance of folds in a piece of fabric, or even a seemingly insignificant life experience. I keep a sketchbook handy; there is no way of knowing when inspiration will hit next. I expect each piece I produce to reflect my experiences as a furniture maker as well as a wood turner, as I strive to produce bold, dynamic pieces that reveal a small part of me. My woodworking career continues to lead me in new and often unexpected directions. I believe the best is yet to come. |
 |
 |
Demos
The Essential Cuts, In order to progress as a woodturner proficiency in the fundamentals of the craft must be mastered. This demonstration will show the fundamental cuts that can be performed with the bowl gouge, spindle gouge, and the skew chisel. Precise tool control and the ability to produce clean cuts will be emphasized. This presentation will greatly benefit turners who are experiencing problems with tool catches, excessive sanding due to torn grain, and constant “redesign” issues caused by lack of tool control. The importance of repeatable tool grinds will be covered as well. Those who attend this demonstration can begin to incorporate the cuts demonstrated and can expect dramatic improvements to their work.
The Art of the Finial: If you have ever spotted an attractive finial and wished you had the ability to create one yourself, this demonstration will guide you through the process using only basic turning tools and the “essential cuts” demonstrated previously. During this demonstration we will explore design concepts that will transform an ordinary finial to a piece of artwork. Topics discussed will include holding the turning blank on the lathe, how to develop fine tool control, and techniques that allow you to turn fine delicate work. There will be a strong emphasis on design concepts.
Design Concepts for Woodturners: What makes a successful, attractive wood turning? If you have ever struggled to create pleasing shapes this demonstration will help eliminate the frustration that plagues so many turners. In this presentation, I will demonstrate ideas and concepts that can be applied immediately to improve your work. I will show how to transform dull, lifeless turnings into bold, dynamic pieces of art by applying these proven concepts. This demonstration will also show how to view your work with a critical eye, which will allow continuous improvement in your work.